
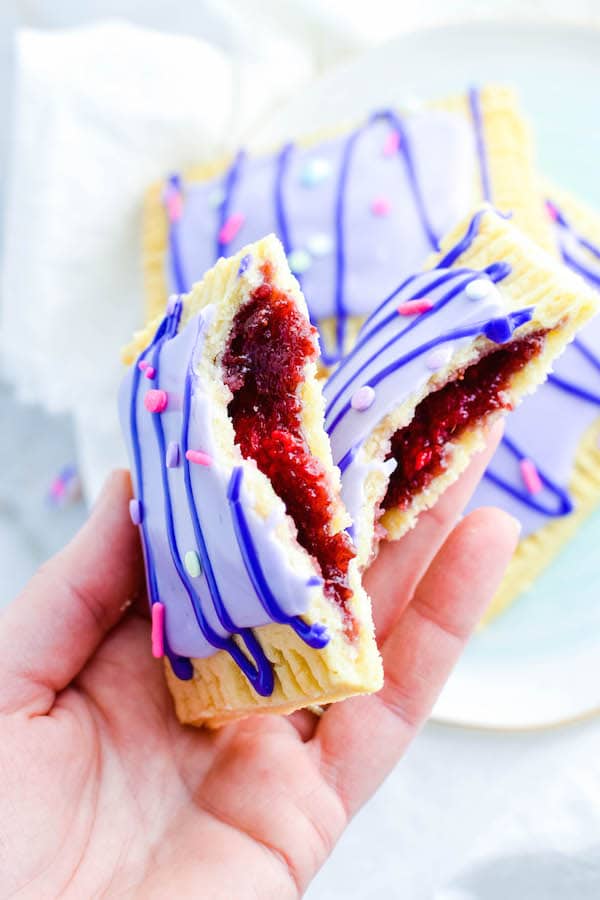

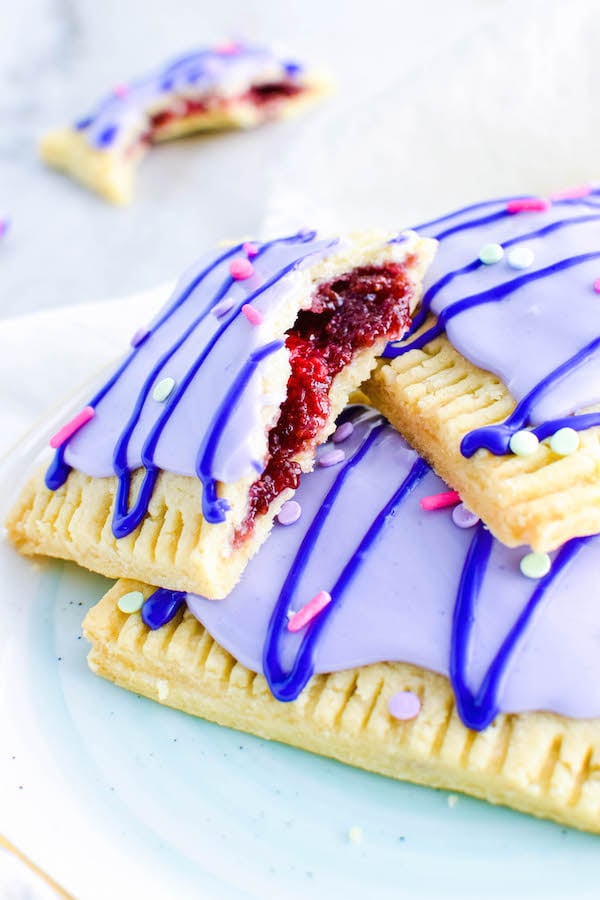
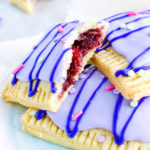
These Homemade toaster pastries or “Pop-Tarts” are even better than the real thing! The perfect buttery, flaky crust filled with raspberry jam then coated in icing and topped with sprinkles.

Homemade “Pop-Tarts” have been on my baking wish list since I first had one at a diner in East LA.
Like most kids, I couldn’t get enough of the store-bought version. Once you have the homemade version though, it’s really hard to go back! That buttery, flaky fresh-baked crust simply can’t be beat!
We love fresh raspberries, so I decided to go that route for the filling. You can very easily adjust this recipe to another fruit filling – like blueberry, cherry, or strawberry. Simply substitute the raspberry jam and fresh raspberries for the fruit of your choice.
Ingredients
- Flour
- Butter
- Egg
- Salt
- Sugar
- Milk
- Jam
- Fresh Raspberries
- Chia Seeds
- Powdered Sugar
- Sprinkles
- Food Coloring

How To Make
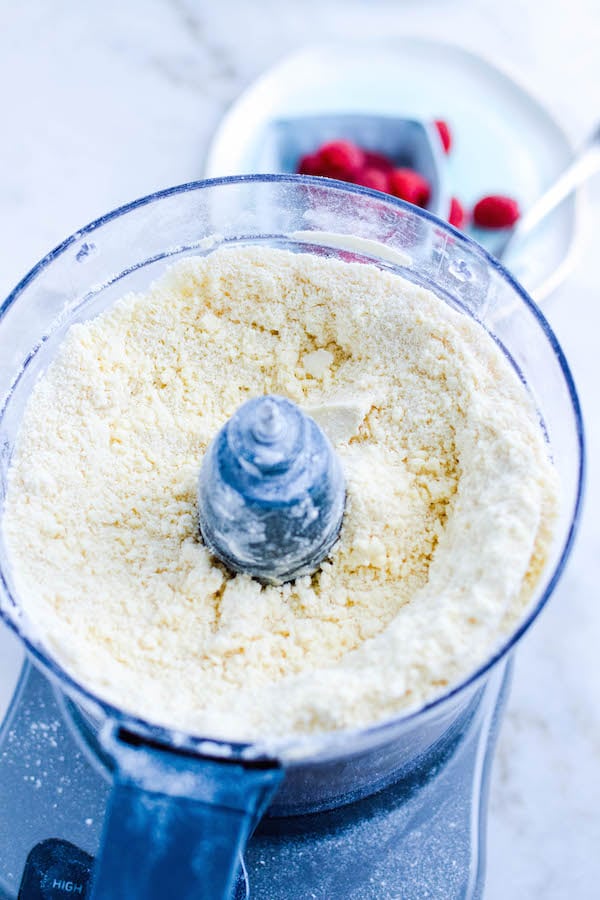
The first step is to make the dough. You will need a food processor (we use this one). Pulse the crust ingredients until it becomes a sandy dough. Then you will need to work the dough on a clean surface, like a marble pastry board, until it comes together. Divide it into two thick rectangles, wrap with saran wrap, then chill in the fridge for 30 minutes.
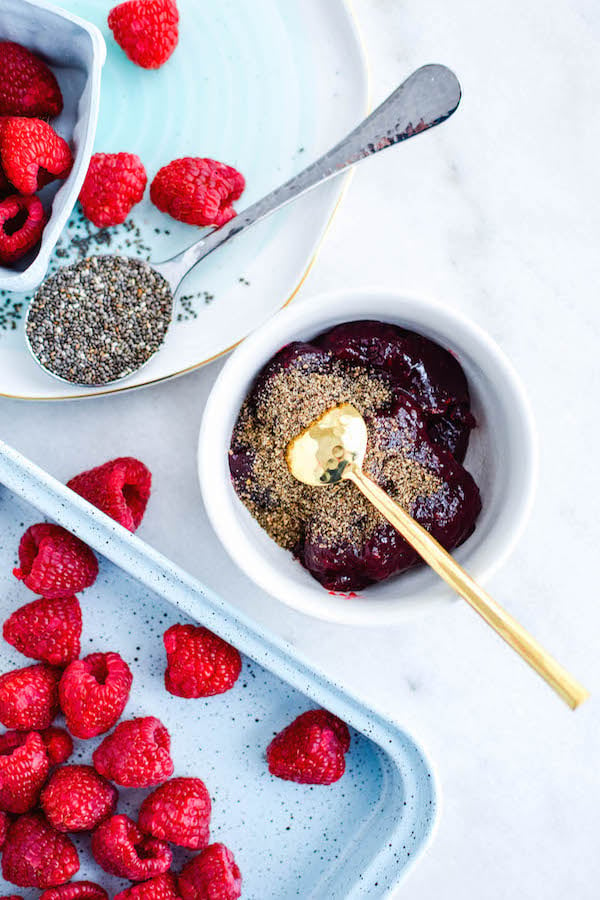
The next step is to make the jam. Simply mix together your store-bought raspberry jam with the ground chia seeds. The jam will start to thicken as it sits. You could leave the chia seeds out, but I do not recommend that. They help keep the jam from leaking out of the edges of the pastry.
After the dough is chilled, use a rolling pin to roll out each rectangle until it is about 1/6″ thick. Cut the dough in half and then into four sections. This will help you be able to make four tarts from each piece of dough for a total of 8 tarts.
Use a fork to poke holes in the pastry that will be the tops. This will help keep the tops from puffing up, you want them to let the steam escape and be flat.
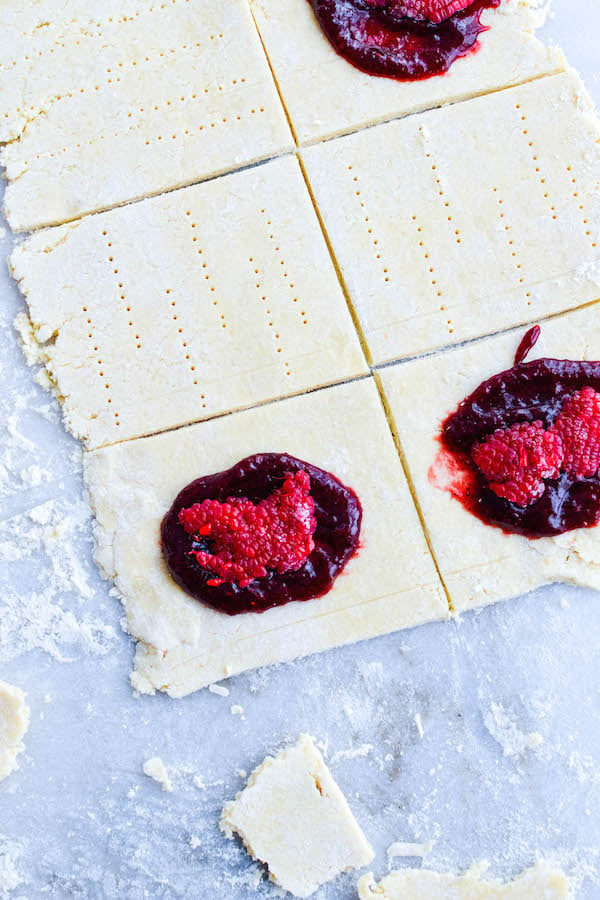
Add one tablespoon of the prepared jam to each tart and place one raspberry sliced in half on the top. Use a little water and a fork to seal the pastries. Chill, then bake.
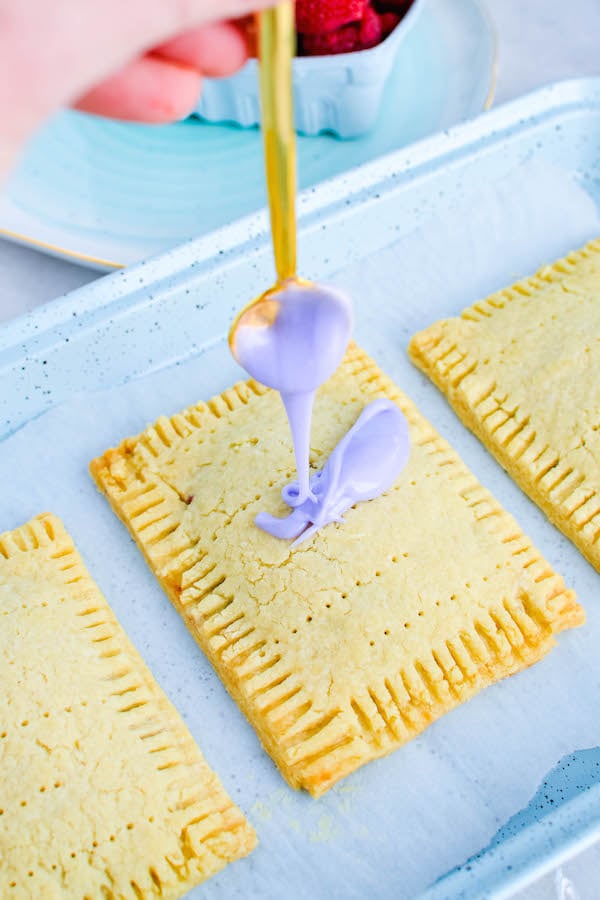
After the pop-tarts have cooled completely, it is time to make the glaze. I did a base glaze, then another glaze that was drizzled on top. I used the same food coloring for each, just adding more to the second glaze to make it darker. Don’t forget to add the sprinkles!
Homemade Raspberry “Pop-Tarts”
A homemade version of the classic Wildberry Pop-Tart breakfast pastry.
- Prep Time: 90 minutes
- Cook Time: 30 minutes
- Total Time: 2 hours
- Yield: 8
- Category: Dessert
- Cuisine: American
Ingredients
Crust Ingredients
2 cups of all-purpose flour
2 sticks (1 cup) of very cold salted butter
1 room temperature egg
1.5 teaspoons salt
1.5 tablespoons sugar
2.5 tablespoons of room temperature milk
Filling Ingredients
½ cup natural raspberry jam
8 raspberries, washed and dried
2 tablespoons GROUND chia seeds (this can be left out but helps to thicken the filling, which will help it stay in place and make it less likely to leak out of the edges).
Topping Ingredients
2 cups powdered sugar
Up to 3 tablespoons of milk
Food coloring of choice, I used the purple from this set of gel colors
Sprinkles
Instructions
Add the flour, salt, sugar and butter to your food processor and pulse until the butter has broken down into small pieces. The mixture will be very sandy looking.
Add in the milk of choice and the egg and pulse again until the mixture will hold its shape when squeezed together, it will still look sand-like.
Turn out onto your clean surface and work the dough for a minute or so until it comes together and you can form two thick rectangles.
Very tightly wrap the two rectangles in plastic and chill for 30 minutes.
While the dough is chilling, mix together the raspberry jam and chia seeds, the jam will start to noticeably thicken as it sits.
After the 30 minutes, remove one piece of dough from the fridge at a time to work with.
Roll out the dough so it is about ⅙ inch thick. (To make this easy, I use this rolling pin and used the orange discs.)
Cut the dough in half and then into four sections. This will help you be able to make four tarts from each piece of dough for a total of 8 tarts (see pictures for reference).
Use a fork to poke holes in the pastry that will be the tops. This will help keep the tops from puffing up. You want them to let the steam escape and be flat.
Add about 1 tablespoon of jam to the bottom half of each tart and then place one sliced opened raspberry on top of the jam.
Use a little bit of water to go all the way around the edges of the bottom pastry piece and set a top piece on and press down with a fork. The combination of the water and fork will help seal in the filling. I just use my fingers to add the water.
I used a knife to clean up the edges and cut off the jagged dough bits. Saving the scraps from both pieces of dough helped to make the 8 tarts. Place the first set of tarts in the fridge to chill while you repeat this process with the second piece of dough. Then chill both trays for about 30 minutes.
Place the tarts on parchment paper and bake at 350 degrees for about 30 minutes or until the tarts are golden brown.
Allow the pastries to cool completely on the tray before mixing and adding the glaze topping.
Mix the glaze and then divide, about 2/3rds for the base color and ⅓ for the darker color drizzle. I used the same color and just added a little more of the gel coloring for the darker color.
The glaze will set rather quickly so you’ll want to make one at a time. Start by adding the base lighter color to the top of a tart, drizzle on the darker color and immediately add the sprinkles. Repeat with the rest one at a time.
Enjoy right away, or let the tarts sit out in the air for a few hours to help the glaze fully harden so they can be stacked and stored.
These freeze quite well for up to a month.
Comments are closed.