
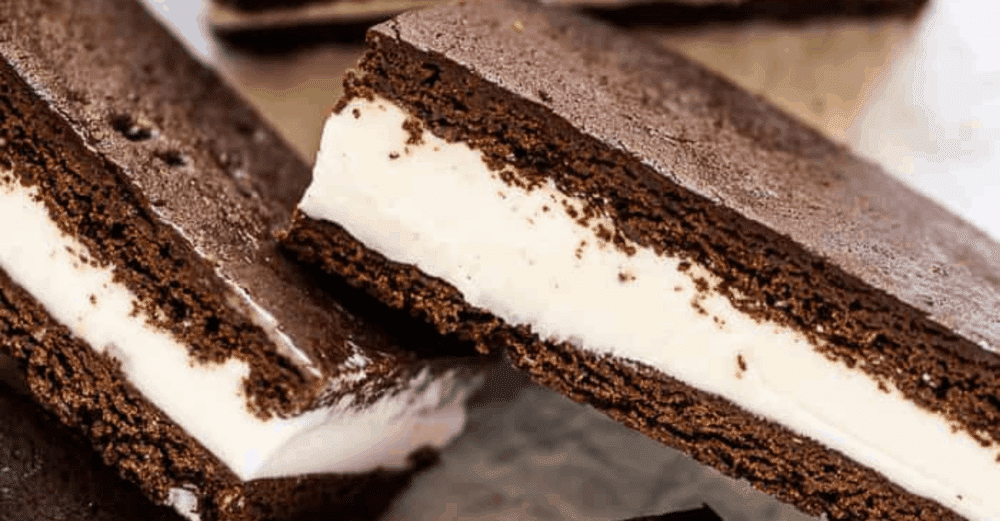

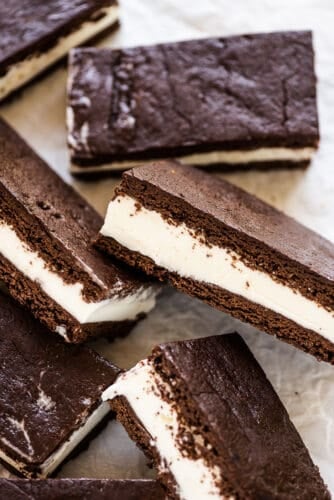
This homemade ice cream sandwich recipe is the ultimate summer treat. They’re made with your favorite ice cream that’s sandwiched between a brownie-like crust that stays soft even when frozen. Make a big batch and enjoy them all summer long!
To take these to the next level, try making them with Strawberry, Brownie Batter Ice Cream, or fun and easy Ice Cream in a Bag.

Brownie Ice Cream Sandwich Recipe
There’s nothing like biting into an ice cream sandwich with a soft, brownie-like crust and your favorite ice cream. This is truly the best summertime dessert and it’s guaranteed to bring a smile to your face. And since this recipe is remarkably easy to make, it’s a great one to make with the kids. We have so much fun making these each summer and dipping the edges of each sandwich in mini chocolate chips, sprinkles, or chopped nuts to personalize each treat.
Once you make them, freeze them wrapped individually so you can have a quick treat whenever you get an ice cream craving.
How to Make Ice Cream Sandwiches
You’ll be amazed at how easy it is to make this recipe! See how easy it is to make homemade ice cream sandwiches? For the full recipe, see the recipe card below.
- Make a thin brownie. This is just like making a regular brownie only you bake it in a larger pan so that it is quite thin. Once it’s completely cool, take it out of the pan and cut it in half and put one half on a some parchment paper.
- Choose for favorite ice cream and give it a quick whisk in a stand mixer or with elecrtic beaters. This is to make sure it’s super soft but not runny. Now pile that soft ice cream on top of the brownie half.
- Sandwich the ice cream with the other half of the brownie then put it into your freezer.
- Cut it into smaller squares once it’s completely frozen. Don’t worry, the brownie doesn’t freeze solid so you’ll be able to cut it.

Tips for the Best Ice Cream Sandwiches
While making homemade ice cream sandwiches isn’t difficult, follow these few tips to ensure your treats turn out perfectly!
- Baking Sheet: Use an 18″x13″ baking sheet for the brownie – no smaller! A small pan will make a brownie that is too thick.
- Cool your Brownies: Make sure that the brownie is 100% cool before you cut it in half and put the ice cream on top. A warm brownie will melt the ice cream!
- Freezing: Don’t rush freezing the giant ice cream sandwich. If the ice cream in the center is not frozen, it will squish out when you try to cut it.
- Toppings: If you’re adding sprinkles, chopped nuts, or chocolate chips to the edges of your ice cream sandwiches, let them sit out for a few minutes after you cut them so the ice cream softens enough for the sprinkles etc to stick to.
- Enjoy! Don’t fret if the ice cream starts to melt or the sandwiches don’t look as perfect as the store-bought kind. Lick up the tasty drips and embrase the casual feel of these absolutely delicious homemade ice cream sandwiches.
How to store Homemade Ice Cream Sandwiches
Unless you’re feeding a hungry crowd right away, you’ll need to keep these in your freezer. Wrap them in plastic wrap or beeswax food wraps and store them together in a freezer bag.
How long will a homemade ice cream sandwich last? If tightly wrapped, these sandwiches will keep well for at least 3 months.

Obsession-Worthy Peanut Butter Cookie Ice Cream
Homemade Ice Cream Sandwich
Ingredients
- ⅓ cup granulated sugar
- ⅓ cup brown sugar
- ¼ cup butter
- ¼ cup milk
- 1 ½ cups semi-sweet chocolate chips
- 2 large eggs
- 2 teaspoons vanilla
- ½ teaspoon salt
- 1 cup all-purpose flour
- ½ teaspoon baking soda
- 8 cups ice cream (any flavor)
- Sprinkles, mini chocolate chips, or chopped nuts optional, for ganishing the sides of the sandwiches
Instructions
-
Preheat your oven to 350 degrees. Line a 18″x13″ pan with parchment paper, letting the ends hang over the edge of the pan.
-
In a medium-sized pot, heat the sugars, butter, and milk until it’s steaming. Remove the pot from the heat and add the chocolate. Let the chocolate sit for 3 minutes then stir until it melts. Once the chocolate cools slightly and is warm to the touch, whisk in the eggs and vanilla.
-
Add the flour, baking soda, and salt to the pot and stir just until it is mixed in.
-
Pour the batter into the prepared jelly pan, spreading the batter evenly to the sides – see notes. Bake for 12-15 minutes, or until it has puffed up slightly and the top looks dry. Remove the pan from the oven and gently press down on the brownie so that it is evenly thin and not puffed up in places – use a paper towel if it’s too hot on your hands. Let the brownie cool completely then use the parchment paper to remove it from the pan.
-
Cut the brownie in half then lay one half on a parchment paper-lined baking sheet.
-
Use your stand mixer or electric beaters to whip the ice cream for about 10 seconds. It should be quite soft and easy to spread.
-
Spread the soft ice cream over the brownie on the baking sheet. Top with the other half of the brownie then put the baking sheet into your freezer for at least 2 hours.
-
Once it is frozen, cut it into smaller ice cream sandwiches. If you’re using sprinkles, mini chocolate chips, or nuts, dip the edges of the ice cream sandwiches in them then wrap each individually and store them in your freezer.
Comments are closed.