
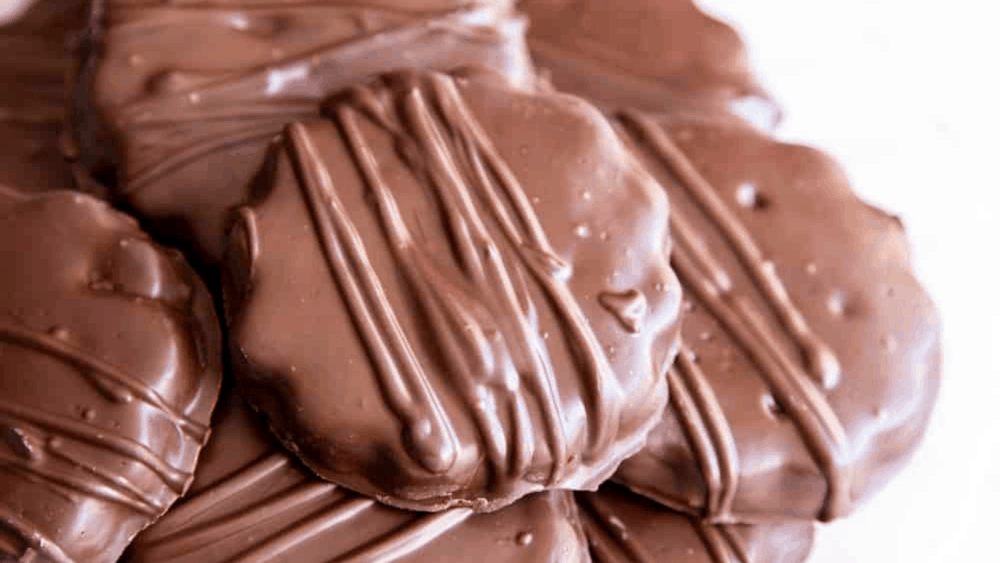

These Thin Mints are way better than the popular boxed version! Perfectly crispy chocolaty cookies are sweetened with just the right amount of mint!
Cookies are the perfect answer to a sweet craving. You have to try these popular recipes the next time you need a cookie, Danish Butter Cookies, Italian Cookies and these amazing Cream Cheese Snickerdoodles.

Easy Thin Mints
No longer do you have to wait for that one special time of year when the Girl Scouts come around to sell their cookies. Now you can enjoy these incredible cookies all year long, and whenever the craving strikes. Thin mint cookies are the top selling Girl Scout cookie and now you can make them in your own home. This homemade cookie version tastes even better than the boxed. You have complete control over your thin mints. And you can make as many as you want to your heart’s desire.
There are many who hoard Thin Mints. They store them in their freezer and nibble on them all year long till that special time comes around again. Now you do not have to do that. Anyone who loves thin mint cookies needs this recipe. If you have friends or family members who love thin mints, you need this recipe. Make them, take them a batch and sit back and watch as you become their hero. These are truly one of the best copycat recipes I have ever made. You have to try it!
Ingredients for Thin Mint Cookies
You can find all you need at your local grocery store. You might even already have it all in your pantry right now! The little bit of work required for these homemade thin mint cookies is so worth it! They are delicious!
- Unsalted butter, room temperature: You can substitute for shortening but the texture will be a bit different.
- Sugar: This will help sweeten the cocoa powder and temper the peppermint.
- Vanilla extract: Vanilla helps the chocolate taste better more like chocolate. I know it sounds weird but it is true.
- Peppermint extract: This will give it that classic thin mint cookie taste.
- Flour: All purpose or unbleached flour will work perfectly for this recipe.
- Dutch-processed cocoa powder: This kind of cocoa gives it a nice rich deep chocolate taste without being too overpowering.
- Salt: Salt will balance the sweet and make them incredible.
Making the Chocolate Coating
Using chocolate chips is ok here too They may not melt quite as smoothly but don’t worry, they’ll still turn out amazing.
- Chocolate melting wafers: You can use any good quality melting chocolate.
- Coconut oil: Oil helps the peppermint mix into the chocolate and helps create a nice shine to the chocolate.
- Peppermint extract: Just enough to give it a bit more of that minty flavor.
How to Make Mint Cookies
You will have to refrigerate the dough to get the best homemade thin mint cookie crisp. So make sure you plan time for it. It is essential to the ideal thin mint cookie!
- Combine: Beat together softened butter, sugar, peppermint extract and vanilla extract in a mixing bowl until combined and fluffy.
- Add: Sift flour and cocoa powder into a small mixing bowl. Stir in salt. Add the flour mixture to the butter mixture. Mix until a dough forms, scrape the side of the bowl as necessary while mixing to ensure the flour is mixing well with the butter.
- Fridge: Scrape the dough out of the bowl onto a piece of plastic wrap. Flatten it into a disk, wrap well and refrigerate for at least 30 minutes and up to 1 hour.
- Roll: When the dough is firm but still malleable, take it out of the refrigerator and roll it into ¼” thick on a cocoa dusted surface. Cut with a 2” cookie cutter. Reroll the scraps and keep cutting out cookies until the dough is gone.
- Freeze: Place the cookies in a container or lined baking sheet and freeze for about 15 minutes while the oven is preheating.
- Prep: Preheat the oven to 350°F.
- Bake: When the oven is ready, place cookies on another parchment-lined baking sheet 1” – 2” apart and bake for 15 minutes.
- Cool: Remove from the oven, let cookies cool on the baking sheet for 5 – 10 minutes before transferring to a wire rack to cool completely.
- Melt: Combine chocolate, coconut oil and peppermint extract in a heatproof bowl, set it over a pot of simmering water, stir until chocolate is melted completely.
- Coat: Dip cooled cookies in the melted chocolate using a fork, turn to coat both sides. Tap excess chocolate off and place coated cookies on a parchment-lined baking sheet. Allow chocolate coating to dry completely at room temperature or refrigerate to speed it up.

Tips for The Best Thin Mints
Don’t get overwhelmed by all the steps. This is a very forgiving homemade thin mint recipe that is easy to make. Make them once and you’ll want to make them over and over again.
- Fluffy: When we say beat the butter and sugar till fluffy, we mean fluffy. It puts air in the cookies that will help create that crispy texture we all love.
- Fridge and Freeze: It is super important to make sure you refrigerate and then later freeze the dough in its different stages.
- Chocolate Coating: To make the coating easier keep the melted chocolate warm. To do this keep the chocolate over the heated water while you dip it. Be very careful not to get water in the chocolate coating however. This will cause the chocolate to seize
- Vary the Chocolate: You can use milk chocolate or dark chocolate to melt and cover your thin mint cookies.
- Cool: Don’t be tempted to coat the cookies while they are still warm, they will crumble into a mess. Cool the cookies completely.
- Peppermint: Even though these are called thin “Mint” you want to use peppermint extract not mint.

Variations and Storing Wafer Thin Mints
Homemade thin mint cookies are simply the best, and you can make them ahead of time and freeze them for later. If you are not a fan of mint there are a few other options you can try.
- Make ahead: Make the dough and wrap tightly in plastic wrap then place in a freezer safe ziploc bag. You can keep it in the freezer for up to 3 months. Let thaw for about an hour before rolling out and continuing with the recipe.
- Flavor Variations: Not everyone loves mint, but you are going to love the chocolate cookie and coating. Use orange zest in the cookie and orange extract in the coating. Or try lemon zest and lemon flavoring. Add almond flavoring and roll the cookies in crushed nuts after the chocolate coating.
- Festive: Make it festive by adding sprinkles, crushed cookie or nuts to the top of the coating before it sets.

Homemade Thin Mints
Prep Time 20 minutes
Cook Time 15 minutes
Total Time 35 minutes
Servings 17 cookies
These Thin Mints are way better than the popular boxed version! Perfectly crispy chocolaty cookies are sweetened with just the right amount of mint!
Cookies
- 4
ounces
unsalted butter
room temperature - ⅓
cup
granulated sugar - ½
teaspoon
pure vanilla extract - ¼
teaspoon
peppermint extract - 1
cup
all-purpose flour - ¼
cup
dutch-processed cocoa powder - ⅛
teaspoon
kosher salt
Chocolate Coating
- 8
ounces
chocolate melting wafers - ¼
teaspoon
coconut oil - ¼
teaspoon
peppermint extract
Serves: 17
Calories171kcal (9%)Carbohydrates17g (6%)Protein2g (4%)Fat11g (17%)Saturated Fat7g (35%)Trans Fat1gCholesterol15mg (5%)Sodium20mg (1%)Potassium105mg (3%)Fiber2g (8%)Sugar9g (10%)Vitamin A173IU (3%)Calcium13mg (1%)Iron1mg (6%)
All nutritional information is based on third party calculations and is only an estimate. Each recipe and nutritional value will vary depending on the brands you use, measuring methods and portion sizes per household.
Comments are closed.